The desktop of your computer is one of the most important parts because you can view all the content you have inside it.
How to change desktop in Windows 11 quickly
There are two ways currently known so you can change desktop in Windows 11, you just have to make sure you follow the steps correctly in each one.
Switch desktop with keyboard shortcuts
This is the most used way because it is simple and fast, you just have to know the shortcuts that you find on your keyboard.
Press the key Windows + Ctrl + Right Arrow. This shortcut is used when you want to change the desktop that appears on the right side.
In the event that you want to change the one on the left side, you must press Windows + Ctrl + Left Arrow.
Switch desktop via taskbar
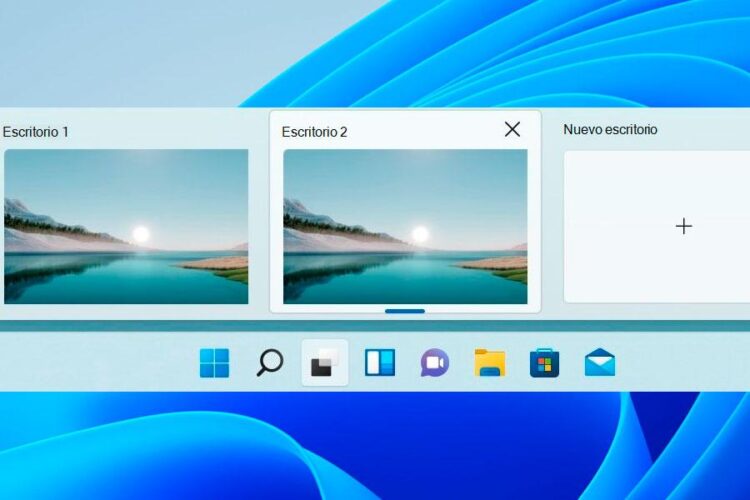
The second way to change the desktop is through the taskbar, with the help of all the icons and actions it includes. In this process you must use a specific one, and it is the one that you find located on the right side of the magnifying glass to search.
There, you must left click, and immediately a new window opens so you can see all the desktops that are open on the computer, so you can select the one you want to go to and that's it.
Virtual desktop management in Windows 11
Managing or managing your virtual desktops in Windows is one of the most important tasks to keep your computer organized. Therefore, you should know the details to which you should pay more attention.
What are virtual desktops?
As you surely know, the Windows 11 interface allows you to use various elements. For example, when you are on the main screen of your computer, the background, icons and even the image you select are called as ''desk''.
When you start using many applications at the same time, your desktop can collapse, or get so messy that you can't quickly find any of the activities you were doing.
To prevent this problem from occurring, the first solution is to administer and manage more than one desktop, where you can carry out different tasks, and prevent it from collapsing.
This group of desktops is what is commonly known as ''virtual desktops''. They are created with the objective that you can have several applications open, but without losing their order.
How to create new desktops with Windows 11?
Creating new desktops with your Windows 11 is easy, and as mentioned above, it is the best option to keep all the applications you have open in order, and to achieve this, you must follow these steps:
- You must start by sliding the arrow of your mouse over the taskbar, specifically on the icon that is between the Widgets and the search icon.
- Another way to do it is by pressing the arrow keys. Windows+Tab, and thus, the option of virtual desktops immediately appears.
- The next thing you should do is click on the option ''Add desktop'', which is generally located on the right side.
You must carry out this process every time you want to create a new desktop with your applications, best of all, there is no limit to this, and also, you also have the possibility of creating different designs for each one.
If you want to have a quick view of each of the virtual desktops of the computer, with the mouse cursor you must select the button ''Task view'', and each desktop appears with the popup menu.
How to close open desktops on the computer?
When you have finished all the activities on a virtual desktop, it is time to close them, in this way you can delete it and thus it does not interfere with the other activities. The steps are easy, just make sure you follow them correctly:
- You must click on the button to see the tasks.
- Next, you need to hover your mouse cursor just over the desktop you want to close.
- Finally, click on the ''X'' that appears in the upper right hand corner of the preview.
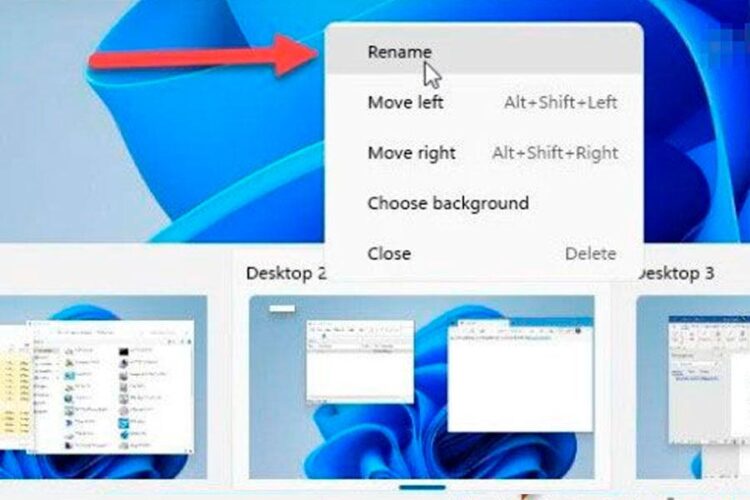
There is also a more direct way to close the Windows 11 virtual desktop, and all you have to do is right-click on the thumbnail that appears in the preview, and then click on ''To close''.
However, if the previous two ways seem a bit long for you, there is also an easier and faster way using the shortcuts of Windows+Ctrl+F4.
Keep in mind that when you close a virtual desktop, the information that has not been closed moves immediately to the left of it.
How to rename virtual desktops in Windows 11?
When you open a new desktop Windows immediately assigns it a default name so that you can identify it, however, in most cases users want to modify it and adapt it to what they are actually using.
The process to change the name of the desktops is simple, you just have to do what we leave you, below:
- The first thing is to hover over the assigned button for the task view.
- Then, choose the desktop and click with the right button of your mouse so that you can select the option of ''Rename''.
- Finally, what you should do is place the name with which you want your new desktop to be known, and that's it.
How to move applications from other desktops on the PC?
When you open multiple desktops within the computer, you will also find many open applications, each one of them has an importance to you. However, there are always some that you use the most, and that perhaps, for this reason, you want to move to another desktop.
- The process to move an application from one desktop to another is very simple, you must go to the icon that is right next to the magnifying glass, and in the taskbar.
- Then, you must select the desktop where the application in question is.
- When you are inside the desktop, the next thing you should do is place the mouse cursor right on the application you want to move, until you take it to the new desktop.
How to order Windows 11 virtual desktops?
The process to order the virtual desktops is very simple, you just have to press the keys Windows+Tab, and a screen opens, where you can move the desks that appear in the list below, and thus change their order.
How to change the wallpaper to the desktops?
As you already know, Windows 11 also allows you to customize your desktop in any way, you can even add the wallpaper you want, and thus identify each one much better. This way none of the desktops are going to look the same, and you can have the applications open without getting confused.
To make this modification, make sure to follow the instructions that we mention below:
- Right-click on the desktop screen you want to modify.
- Immediately, a new menu appears where you must select the option of ''Personalization''.
- Done, it's time for you to choose the background of your preference, and thus modify the desktop.